Creating Student Bloggers in 5 Easy-To-Follow Steps!

It is estimated that 2 million blog posts are written everyday. That is over 10 million per week.
The sheer amount of content makes learning about and teaching this writing task daunting. Nevertheless, my students and I faced this challenge head on as we worked together to craft and publish the first of what will hopefully be many posts. The following is the step-by-step approach we used to get comfortable and confident with blogging.
Step 1: Write!
Before I introduced the blogging writing task, I wanted students to have a wealth of ideas to pull from for their first posts. So, we spent a few class periods writing to gather ideas. First, we curated expert lists. Students had five minutes to list as many topics they considered themselves “experts” on. After we listed and discussed some of our expertise, we returned to the items and brainstormed types of writing we could do on the different topics. For example, one student who considers himself an expert on backpacking realized he could write a how-to guide or keep a journal of his backpacking trips.

Another list we created lamented all our pet peeves. After students furiously scribbled annoyances for five minutes. they had to chance to voice their pet peeves to each other through conversation. I eventually had to cut the diatribes off after several noisy minutes and invited students to unleash their complaints on paper through longer freewrites.
Finally, we spent an entire class period doing writing sprints. For the first round, we sprinted through crafting one minute top five lists of entertainment, attractions, activities, bests, and worsts. We then revisited the quick brainstorms and wrote for longer, five minute bursts in different modes: review, tutorial, guide, travel, and fandom.
Step 2: Notice
Rather than lecture on a solitary approach to crafting a blog post, we spent several class periods reading and noticing. On day one, groups of students focused on one popular type of post (they chose from reviews, tutorials, travel journals, ultimate guides, fandom, and art/photography) and explored as many blogs within this type as possible. While they explored, they created a list of observations and curated a resource of examples. On day two, each group shared their findings and pointed out exemplars to the class.
Step 3: Keep Noticing
Stuck on how to start? Study model hooks! Not sure how to format or develop the post? Look at how others did it! Clueless on how to end? Which blog endings do you enjoy most? We drew inspiration from other writers throughout each part of our writing process.
To get our writing started, I gathered a collection of model hooks to share with students. We discussed and experimented with leads that asked questions, showed enthusiasm, used dialogue, got descriptive, created figurative comparisons, etc.
To continue the flow of our writing, we worked in groups to study and notice how others developed their posts. In groups, students closely studied one sample post and highlighted model sentences, noted structural moves, and listed supporting details. They then moved around and studied their classmates’ observations; noting what might work for their writing.
Finally, to guide our endings we turned to a blog post on this topic – 7 Powerful Ways to End Your Next Blog Post. This blogger encourages writers to summarize, motivate, link, and question readers at the close of their posts.
Step 4: Talk about it
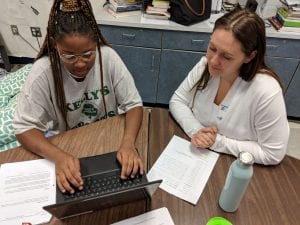
Just like any writing task, I gave my students multiple opportunities to conference about their writing. They worked through their ideas and drafts with a writing mentor and revised and edited with each other. Since our audience reaches beyond the classroom with these posts, the goal is to feel confident and comfortable with the final product before we hit publish. While this step is listed fourth, it really was an ongoing part of our writing process.
Step 5: Publish it!
After much trial and error (my school’s firewall blocks many blogging sites), I finally settled on EduBlogs.org as our class blogging platform. The site is relatively user
friendly and includes many key features for an unbeatable price – free! It was a little time-consuming to get each student added as a blogger – I needed to send individual invitations to each student’s email, and then guide them through changing the automatically generated passwords to more user-friendly passwords. However, the platform does allow the teacher to determine each student’s role in the blog – subscriber, contributor, author, editor, or administrator. If you want to moderate posts before publication, invite students to take on the role of a contributor. However, since I hope my students will blog on their own and outside of class requirements, I invited them to blog as authors, which enables them to post independently. I still reserve the ability, as the administrator, to edit or delete posts if necessary.
Do you blog? If so, what do you do to make your voice stand out among the more than two million who post daily? What advice to you have for me and my students as we continue exploring and contributing to the world of blogging? Please post a comment below!
This is your first comment!
To delete a comment, just log in to your dashboard and you will find the option to edit or delete them.
You can learn more about comments here.